Harvey Milk: Messenger of Hope | The Evolution of an Exhibition
[above image]
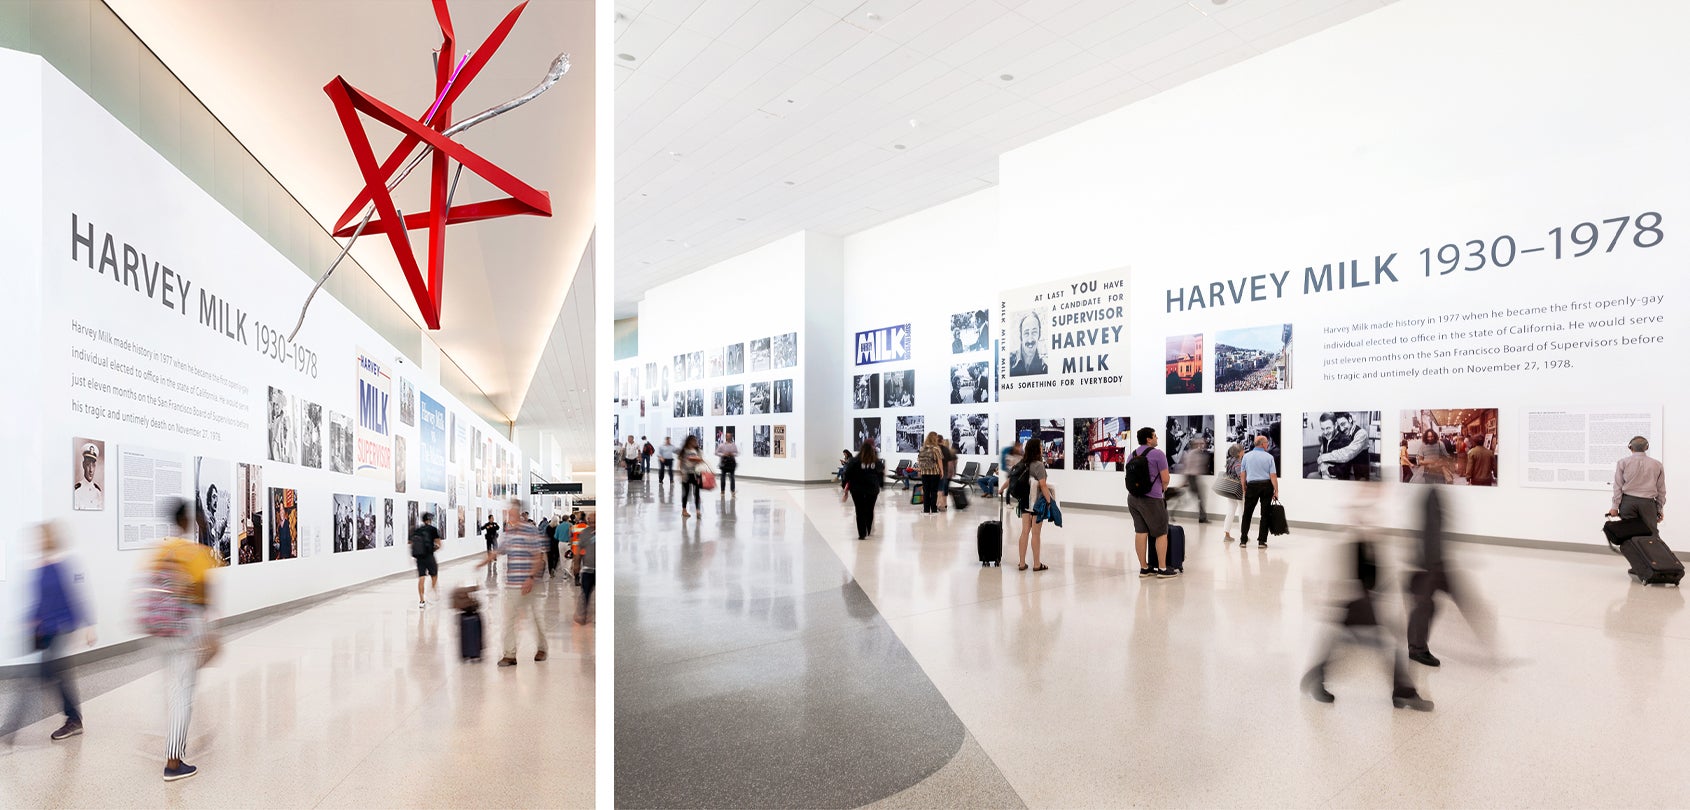
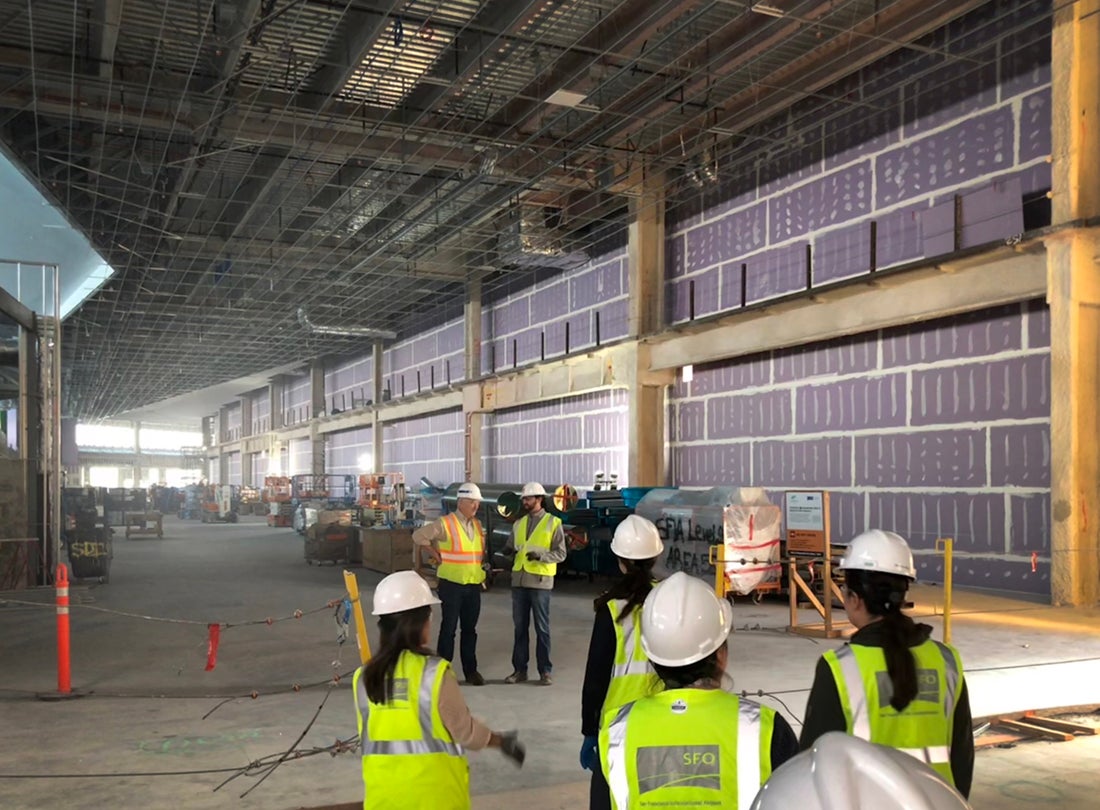
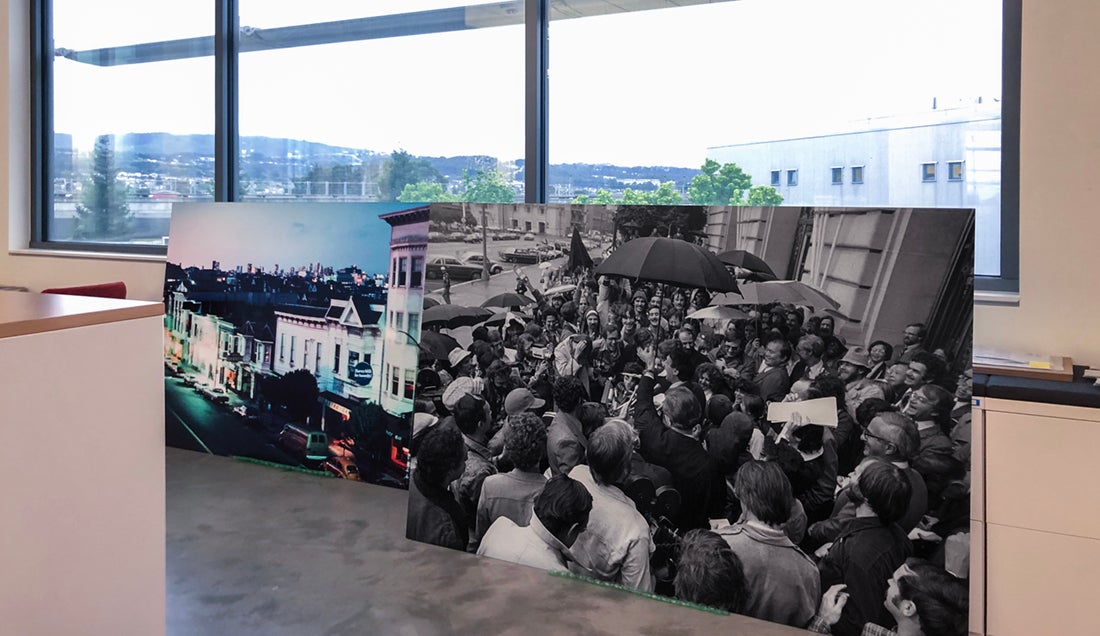
Installation of Harvey Milk: Messenger of Hope at SFO International Airport located in Harvey Milk Terminal 1
My name is Kai Caemmerer and I am the Curator of Photography at SFO Museum. The Museum has seven gallery spaces dedicated to rotating photography exhibitions and I am responsible for maintaining an exhibition schedule for these spaces, which is typically programmed about two years in advance. The exhibitions rotate about four months on average, and I work with photographers—local, national, and international—ranging from early-career artists to those who have already made significant contributions to the medium.
In 2017, the Museum’s curatorial team was informed that Terminal 1, which was at that point undergoing significant renovation, would be dedicated and named in memory of Supervisor Harvey Milk upon its first phase of reopening in 2019. The Airport had identified a large-scale wall—400 feet in length and visible to all passengers entering or leaving the Terminal—to be reserved for an exhibition dedicated to the life and legacy of Harvey Milk and requested the Museum’s involvement in the project.
With the wall constrained to a 2-D exhibition that would be predominantly photographic, I was given the opportunity to work closely on the project and was involved with nearly all aspects of the exhibition, from preliminary content research to the installation of the final exhibition material.
As a case study, this exhibition provides an interesting look into the steps taken to produce a large-scale exhibition at SFO International Airport and offers some insight into the unique considerations and design constraints encountered when programming exhibitions for the travelling public. Below, I’d like to offer a brief overview of the design and planning process for Harvey Milk: Messenger of Hope.
Sourcing Content
Early in the exhibition planning and research process, it became clear that [1] despite the scale of the exhibition space, it would be unrealistic to attempt to represent the entire history and importance of this extraordinary man in a single exhibition, and [2] because Harvey Milk played such an important role in San Francisco communities, we would want to directly involve the community while sourcing content for the exhibition.
As a result, we decided to conceptualize the exhibition as a display that would focus primarily on Harvey Milk’s politically active years during the 1970s, and which would aim to contextualize his historic importance for those visitors who may be largely unfamiliar of his life and legacy.
 [inset image]
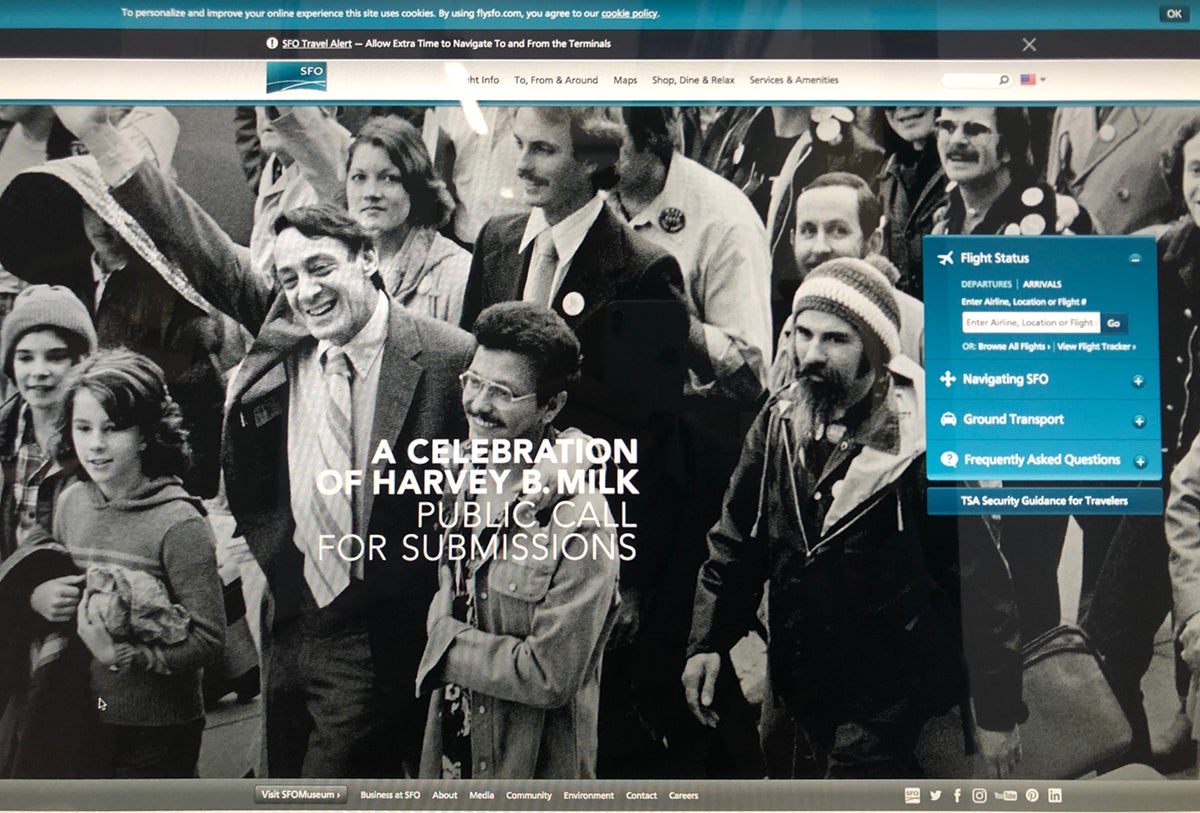
A public call for material pertaining to the life and legacy of Supervisor Harvey Milk was featured on SFO International Airport’s homepage in Fall of 2018; background image by Dan Nicoletta
Additionally, we would issue a public call for original photographs and material related to Harvey Milk during this time period. Using a public call as one avenue to source material for the exhibition was driven by an effort to not only collect and share but to actively contribute to the history surrounding Supervisor Milk—each submission made would be shared with our partners at the James C. Hormel LGBTQIA Center and the GLBT Historical Society, who would review and consider submitted imagery for donation into their respective permanent collections.
Additional exhibition material and imagery would be sourced from the James C. Hormel LGBTQIA Center and the GLBT Historical Society, who graciously made their archives available for our use in this exhibition. Likewise, we were fortunate to have the support and guidance of photographer Dan Nicoletta and access to his vast archive of imagery from the 1970s.
 [inset images]
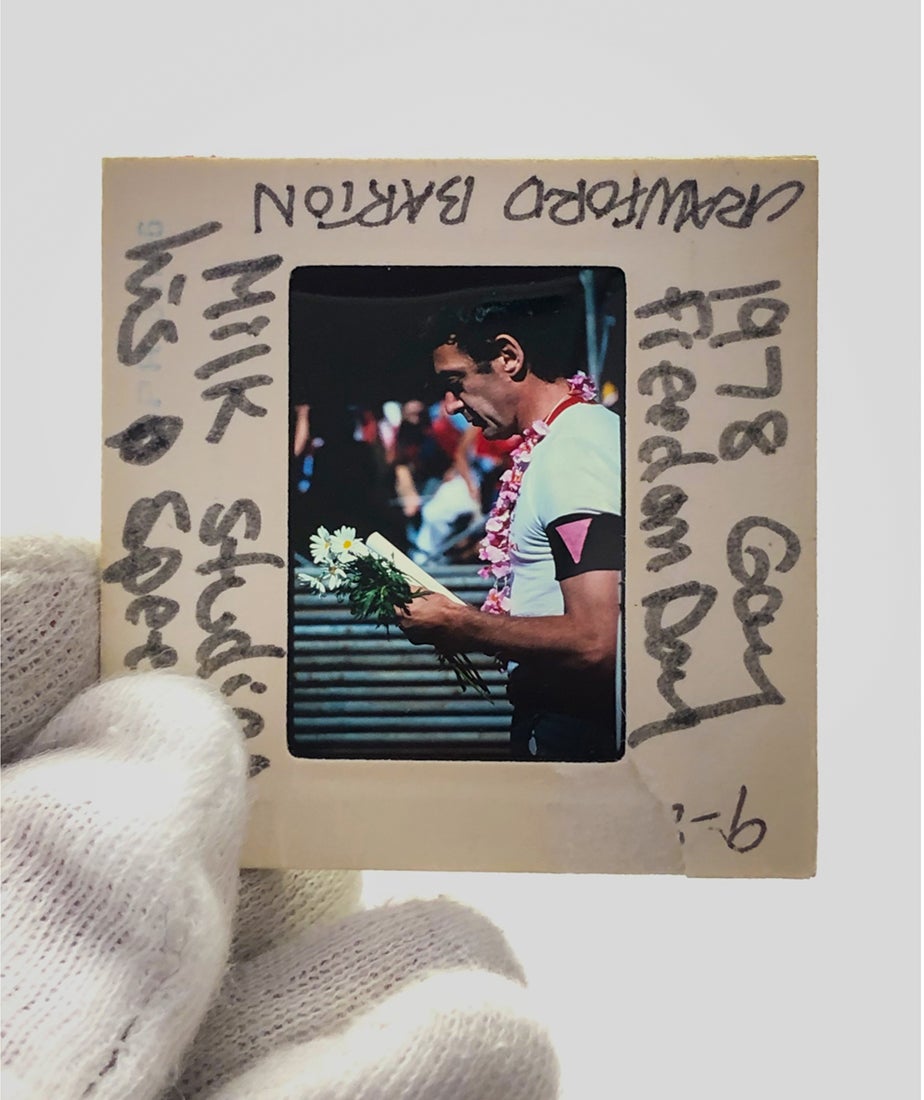
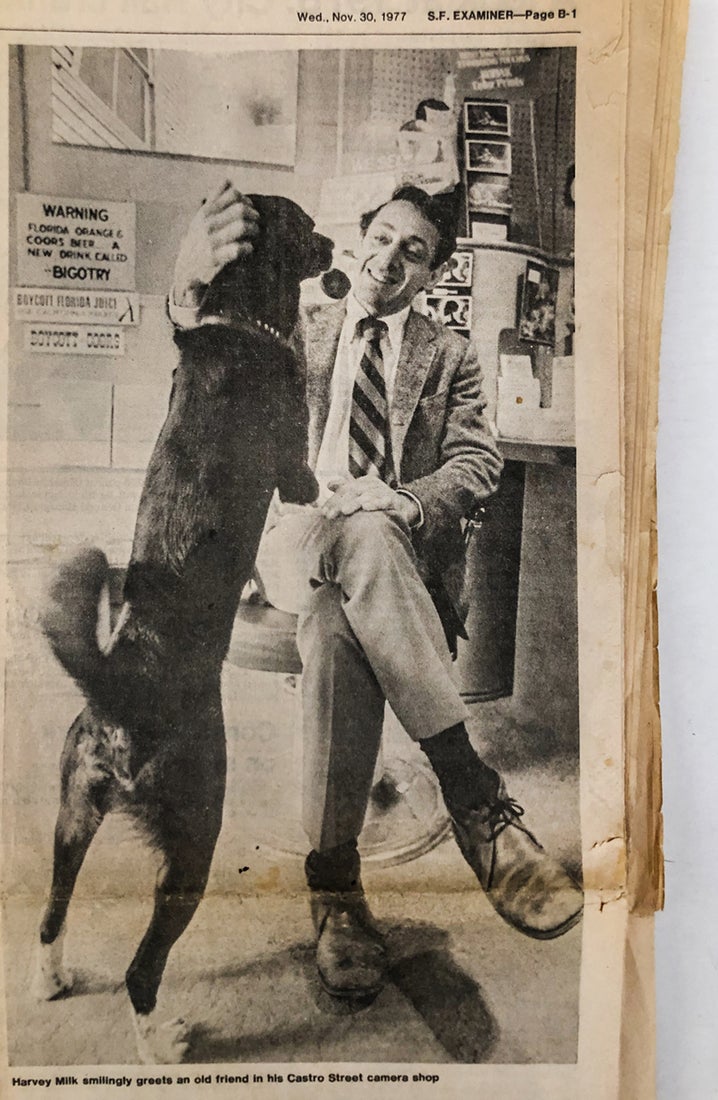
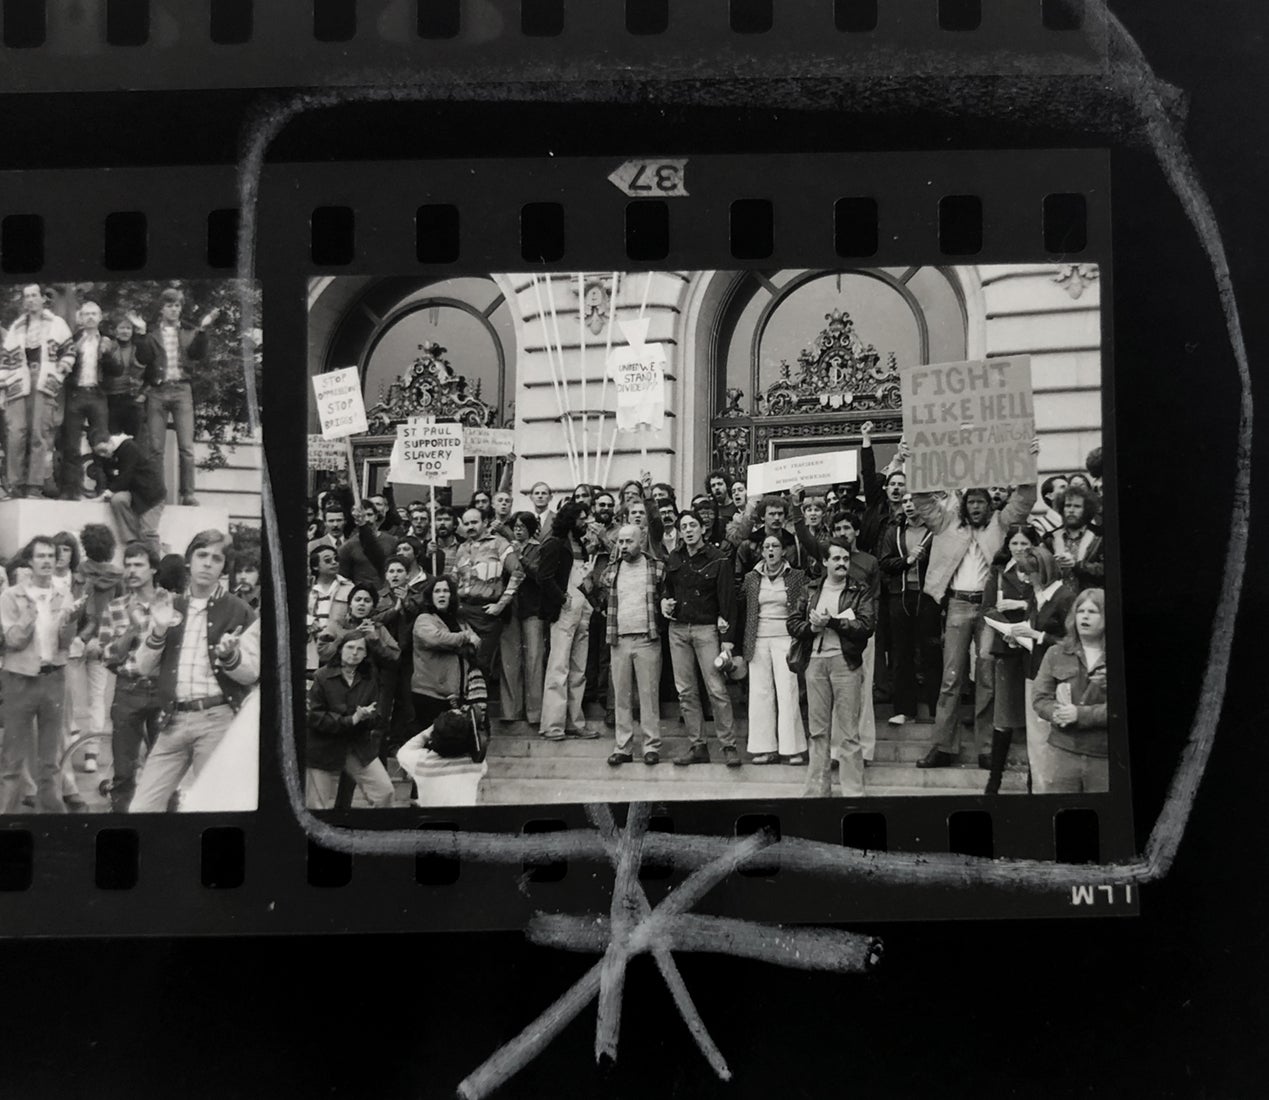
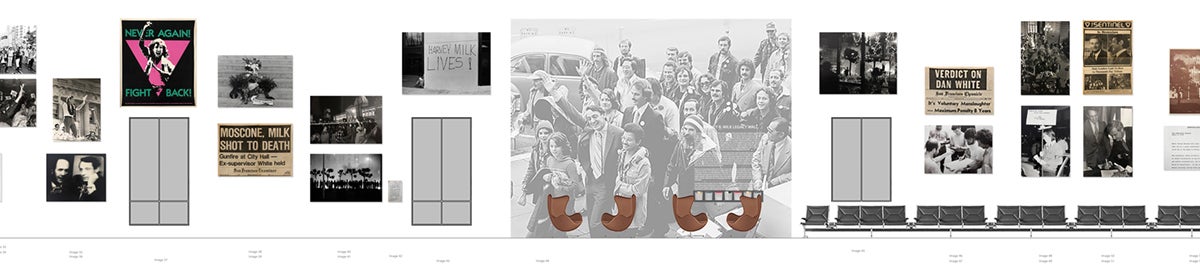
Reviewing material from the Scott Smith Collection of the Hormel Center at the San Francisco Public Library — this image was made by photographer Crawford Barton of Harvey Milk preparing to speak at Civic Center Plaza on Gay Freedom Day June 25, 1978. Image Courtesy of the GLBT Historical Society | One of the numerous SF Examiner newspaper articles held in the Scott Smith Collection at the Hormel Center. This image is captioned, “Harvey Milk smilingly greets an old friend in his Castro Street camera shop.” | A contact sheet of Efren Ramirez photographs of an Anti-Proposition 6 rally on the steps of San Francisco’s City Hall May 1, 1978. Image Courtesy of the GLBT Historical Society
Preparing Content
Once the exhibition content was selected, we began digitizing it in high enough resolution to produce large-scale prints.
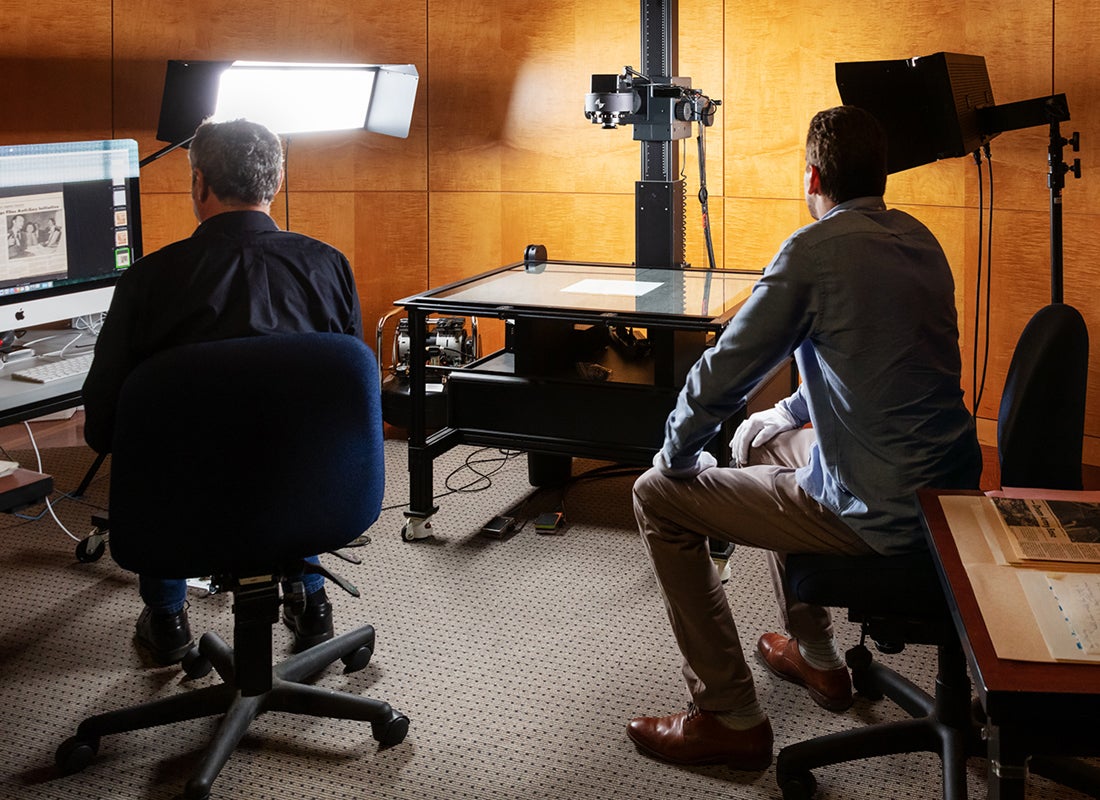
For prints, negatives, and other material sourced from the archives of the Hormel Center, we were fortunate to have the opportunity to work with SFPL staff in their DigiCenter to produce high resolution scans. Learn more about this process, here.
[inset image]
SFO team working with the team at the SFPL in their DigiLab; the SFPL works with a Digital Transition Cultural Heritage scanning system that uses a Phase 1 sensor and is capable of producing digital captures in excess of 100 megapixels
Content selected from submissions made to the public call was temporarily loaned by the Museum and brought in-house to be digitized by Museum staff. A number of prints, campaign posters, and ephemera were loaned to the Museum by the GLBT Historical Society — these were also digitized at our Museum facilities.
[inset image]
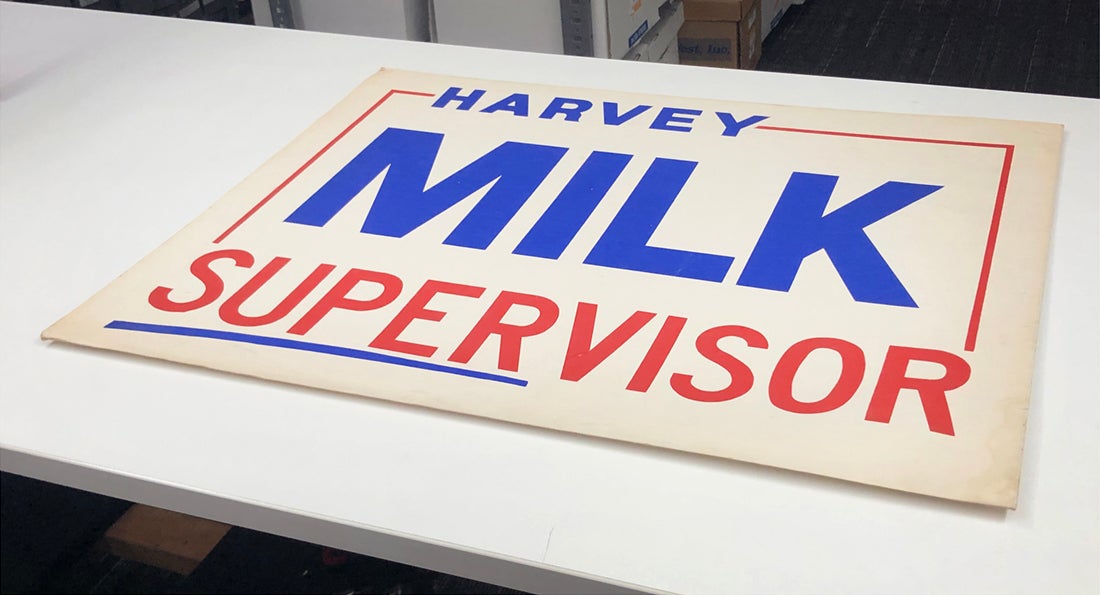
Harvey Milk campaign sign from 1975; original was loaned from our partners at the GLBT Historical Society and digitized by Museum staff for large-scale reproduction
Many of our sources were able to provide us directly with high-resolution print files, and for those who did not have image files that were adequate for our target print size, we contracted with digital labs closer to their location in order to produce digital captures and scans.
Initial Layouts
As we began collecting and scanning content for the exhibition, we began simultaneously drafting initial layouts for the space. We felt that the exhibition content would be more accessible, especially to those unfamiliar with Harvey Milk’s story, if it was organized in a loosely-chronological manner. Because traffic would flow in both directions at this location, we opted to organize the earliest content on the far-left and far-right sides of the exhibition wall, with later content concentrated towards the center. This way, visitors would be able to have a cohesive experience with the exhibition regardless of their direction of travel.
[inset image]
A preliminary layout exploring a randomized grid approach to the exhibition space
Over the course of about six months, I worked closely with the Museum’s graphic design department to produce numerous iterations of these layouts. The earliest drafts were concerned primarily with the inclusion of content that represented key moments in Harvey’s life and political work. Later iterations of the layouts became more concerned with the visual balance and overall “look and feel” of the exhibition.
The Space
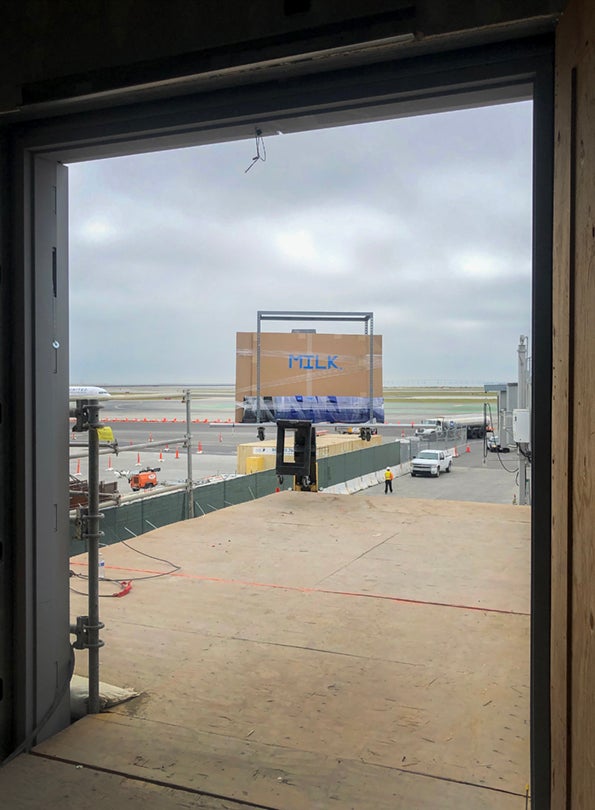
In November of 2018, we got our first glimpse of the exhibition wall during a tour of the Harvey Milk Terminal 1 construction site. The wall is approximately 400 feet in length and 30 feet tall. At this time, the wall was framed, and we could get a sense of scale for the exhibition. Because the space is sizeable, we wanted the imagery and content to be large enough so that it remained visible and could be enjoyed by visitors on the far side of the walking path, but not so large that it would overwhelm visitors that had the time and interest to get close and engage with the individual photographs.
[inset image]
Museum staff during a tour of the Harvey Milk Terminal 1 construction progress in November of 2018, facing SE towards the future site of the Harvey Milk exhibition
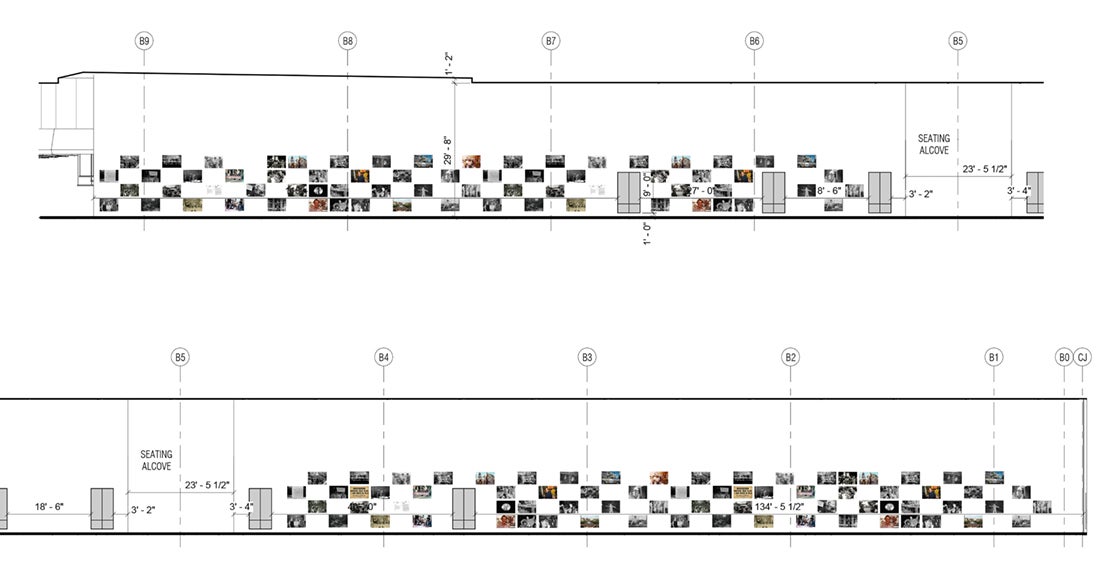
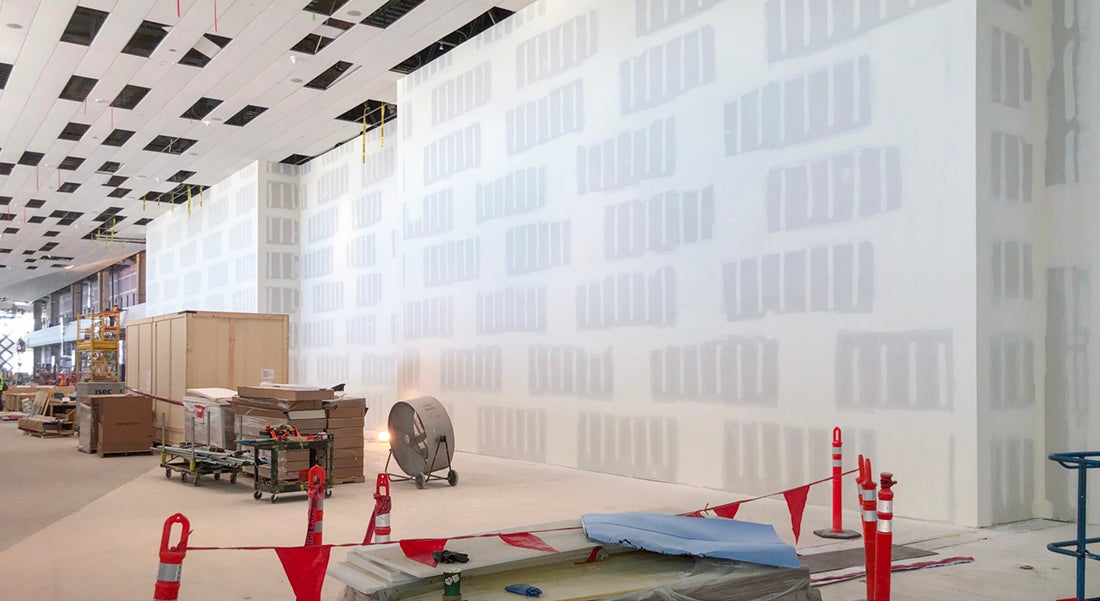
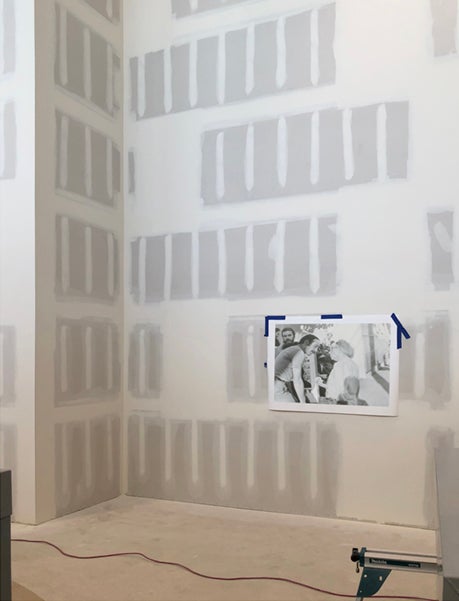
About four months before we were scheduled to install the exhibition, the exhibition space received drywall and we were able to take physical measurements of the exhibition wall and update our initial layouts, which had been built from elevation drawings provided by the architects. Our new layouts were accurate to the inch and would be shared with our installation team for quick reference throughout the installation process.
[inset image]
A portion of the final to-scale layout, that would be shared with the installation team for reference on site
[inset images]
Exhibition wall has been drywalled and is ready for paint | Taping a proof photograph to the wall helped us to recognize that a 24'' x 36'' print would be quickly overwhelmed by the scale of the exhibition wall—we would need to produce most images in sizes closer to 4 x 5 feet
Production
Upon completion and approval of the exhibition layouts, we began the production process. Because the exhibition would be located in a high-traffic area, we opted to work with a local printer who is capable of producing dye-sublimation prints on aluminum panels. We have used these on projects in the past and have found them to be lightweight, extremely durable, light stable, and easy to clean—perfect for a highly trafficked Airport installation! Over the course of one month, we produced nearly 100 aluminum prints, ranging in size from 16 x 20 inches to 4 x 5 feet. Additional non-photographic material such as Harvey Milk’s campaign posters were reproduced as large-scale vinyl prints by the Airport’s Reprographics department in sizes upwards of 12 x 18 feet.
[inset image]
First round of exhibition prints retrieved and unpacked at the Museum’s facilities building for review and color proofing by the graphics team
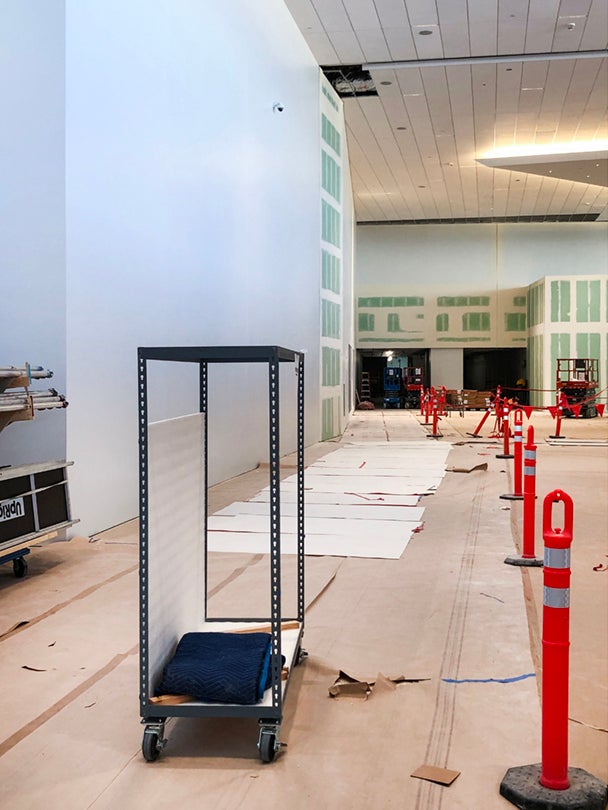
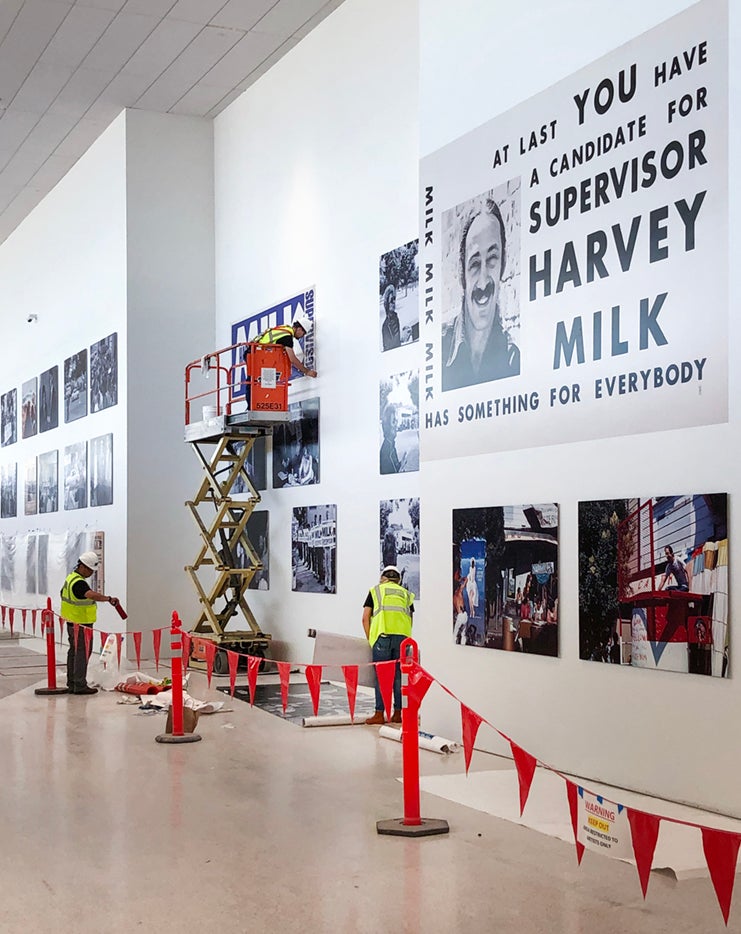
Installation
Because the exhibition needed to be installed before the Terminal opened to the travelling public, installation would need to occur while the area was still a live construction zone. This presented a number of logistical considerations during the installation process. First, everyone involved with the installation of the exhibition would need to attend safety training courses, adhere to OSHA worksite guidelines, and wear full PPE while on site. Additionally, all deliveries to the construction site would need to be scheduled in advance to be delivered via the airfield and would need to be inspected by Airport duty managers and then escorted to the equipment loading zone. We were sharing this single loading zone with every other contractor and vendor working on the Harvey Milk Terminal 1 construction site. We were given fifteen-minute time-slots and could not be late! All tools, scaffolding, lifts, artwork, etc. would need to be packed in order to be lifted via a Gradall onto the second floor of the Terminal and would then be transferred via carts to the exhibition wall at the far end of the Terminal—a brisk ten-minute walk in each direction.

[inset images]
After being escorted through the Airfield, Museum vans were unloaded onto the Gradall | The first load of 8 carts containing 12 prints each arrives onto the 2nd floor of the south end of Harvey Milk Terminal 1 | Prints were transported to the exhibition wall in “speed racks” built by the Museum’s prep team
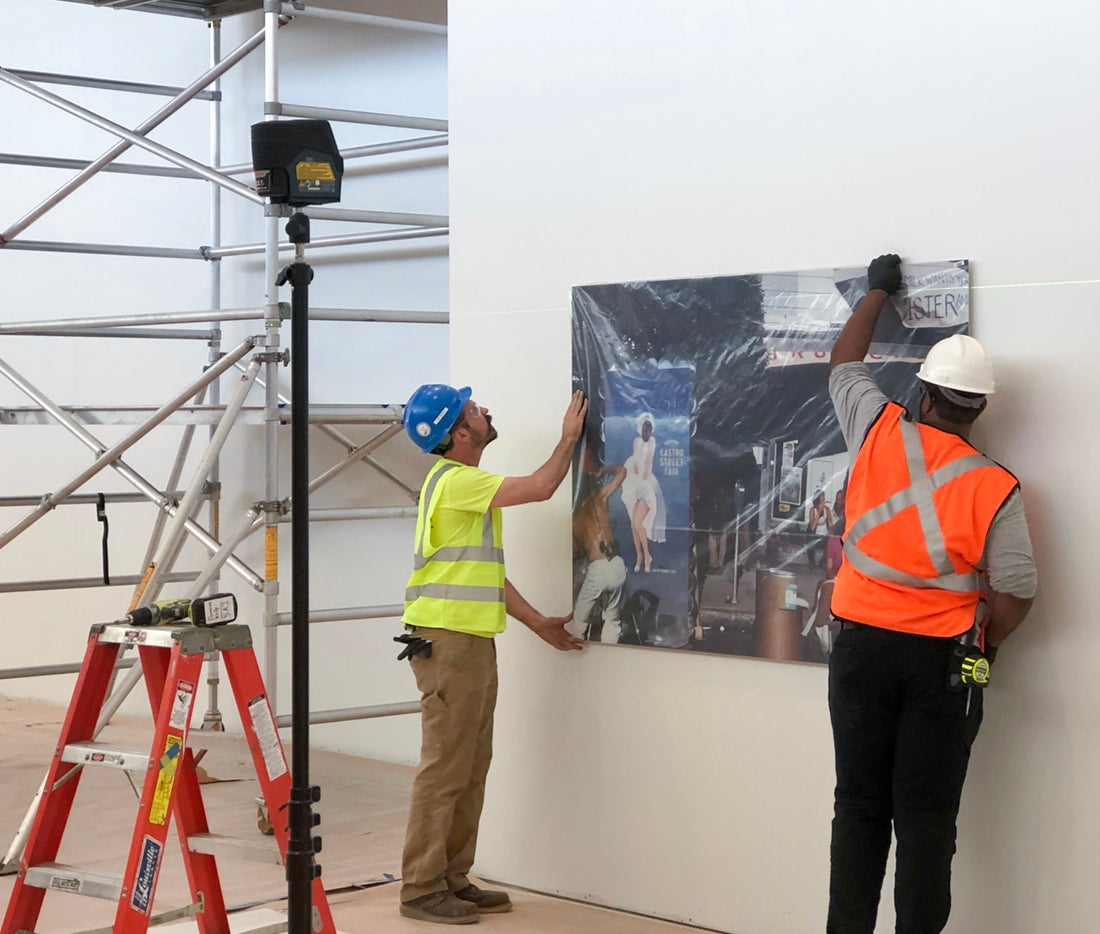
Installation began shortly after the artwork and tools had been delivered to the install location and was completed over the course of two weeks. During the first week, the Museum worked with a local art handling company who installed the prints made on aluminum panels. The next week, we worked with a local graphics installation company to install the large-scale vinyl graphics. With the height of the exhibition wall at nearly thirty feet, much of this work was performed with the use of rolling scaffolding or a Genie lift.
[inset images]
First day of installation | Due to the dusty environment of the work site, all images remained wrapped in plastic until shortly before the Terminal opened | Installing the large-scale vinyl reproductions of Harvey Milk’s campaign material
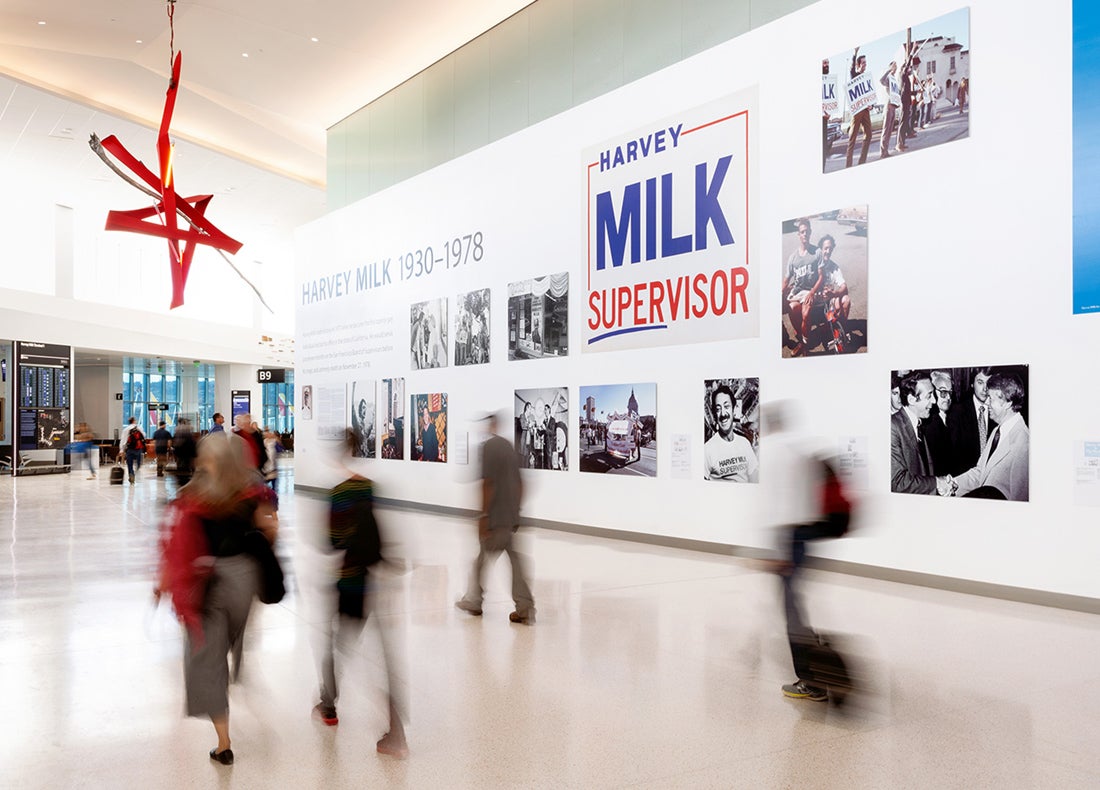
Opening
Harvey Milk: Messenger of Hope opened to the public in July of 2019. Given its scale and proximity to the current entrance and exit locations of the Terminal it has undoubtedly been seen by the majority of the nearly 3.6 million passengers that have flow into or out of Harvey Milk Terminal 1 since operations began in Summer of 2019.
[inset image]
Visitors stroll past the South end of Harvey Milk: Messenger of Hope in September 2019
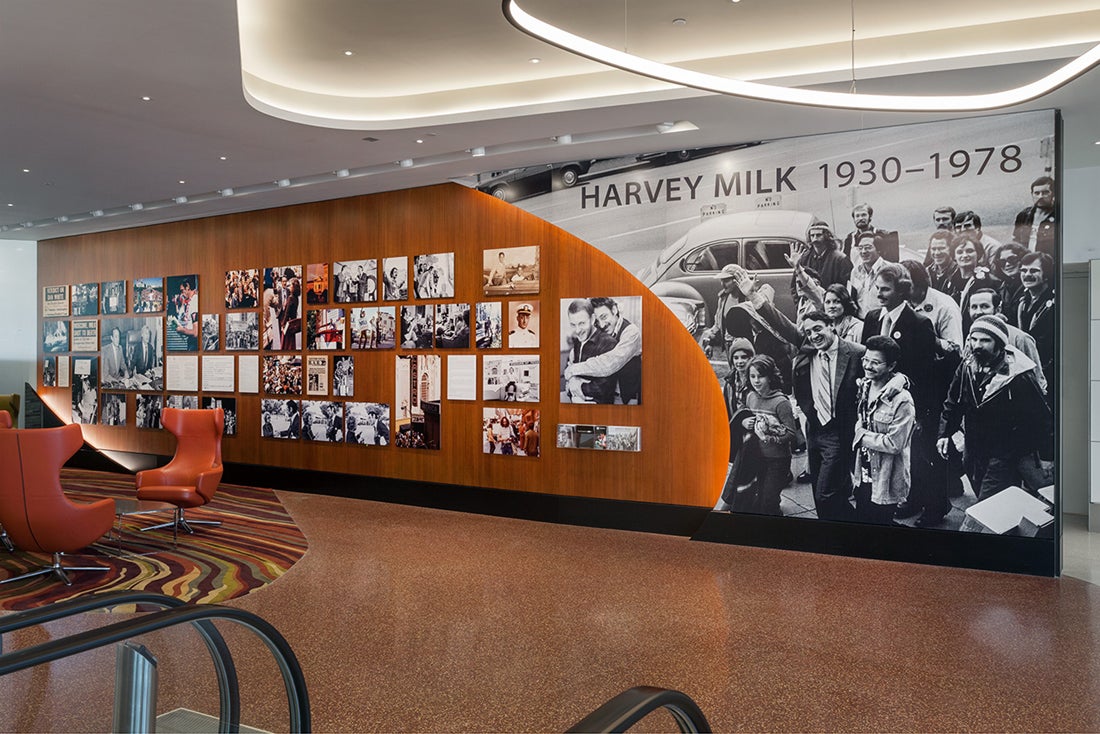
In early spring of 2020, we installed a second version of the exhibition, located in a smaller, more intimate pre-security gallery. This exhibition is long-term and features approximately forty images culled from the images displayed in the original exhibition discussed in this blog.
[inset image]
Installation photograph of Harvey Milk: Messenger of Hope, phase two located pre-security in Harvey Milk Terminal 1
For a full list of contributing photographers, exhibition partners, and to view an exhibition catalog, please visit our website, here.
Kai Caemmerer
Curator of Photography
SFO Museum